Legend of Zelda: Breath of the Wild (Part 11): Central Tower and Hyrule Castle


Part 11 of 11, of a partial playthrough of "Legend of Zelda: Breath of the Wild" for the Nintendo Switch. In this part, Link goes to the final place marked on his map, which is Central Tower. This is a tough one to activate, because there are many guardians around! The trick is to do a double jump up, and a jump to the side. That way, you're moving so quickly the enemies don't have enough time to attack you, and if they DO attack, you probably dodge because of your fast movements. It takes a while to activate Central Tower, even with this strategy. In my defense, I couldn't hear the game while playing, so I missed all the audio cues for the guardian attacks.
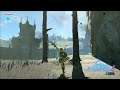
Link explores the province for a bit, and he manages to break into the castle. Everyone in the livestream chat was amused to see that I had much success in getting to the castle, when I had zero success in finding Kakariko Village, which is supposed to be the easy beginner area with lots of characters, story, and a tutorial shrine that teaches you how to fight.
Since this is the last video of my partial playthrough, I tried to do a fair amount of talking about the game in general.
The Arglefumph logo animation at the start of this video was made by Serge Hanna. The music was made by alwaysthebutler. The logo at the end was made by Kelly Marshall.