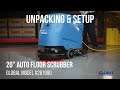
261990 Global Industrial Floor Scrubber Unpacking & Setup


Global Industrial model 261990 Auto floor scrubber quick start guide.
This video guide will help get your floor scrubber setup and running quickly.
Review the complete instruction manual included with your floor scrubber.
Cut away the plastic wrapping and poly banding from the outer carton.
Remove staples at base and lift the carton over the floor scrubber.
Cut poly banding and remove wrapping from machine.
Remove the wood chocks and wheel strapping on both sides.
Lower the built in pallet ramp and check for clearance prior to machine roll off.
Step on the rear pedal to raise the front pad driver, and lift rear handle to raise squeegee assembly.
Carefully roll the floor scrubber off the shipping pallet and down the ramp.
Loosen both black knobs on the squeegee assembly and place at the rear of the machine.
Align the knobs with the slots on the machine to install squeegee assembly.
Once installed, tighten both knobs, and connect the vacuum hose to the center.
Remove the power cord, instruction manual, and keys from the collection tank.
Connect the GFCI power cord to the scrubber and a wall outlet.
Test the GFCI breaker by first pressing the RESET button, The TEST button, and then the RESET button once again.
Remove the cap and fill the tank with clean water and the proper cleaning solution.
Check the water level gauge to avoid over filling.
Turn the yellow water valve to the horizontal open position to allow water flow.
Install the correct type of scrubbing pad based on your floor care and scrubbing needs.
The Pad driver is included and pre-installed. Scrubbing pads sold separately.
Insert the key and turn to the ON position.
Lower the squeegee to the floor by lowering the rear control handle.
Lower the pad driver to the floor by disengaging the rear pedal.
Engage the vacuum and scrubber motor by pressing both buttons on the control panel.
Your auto floor scrubber is now prepared and ready for operation.