How To Fix No Internet Access Even When WIFI Is Connected On Windows 10


How To Fix WiFi Connected But No Internet Access On Windows 10
Step 1) First of all, make sure you have the internet working on different devices to rule out any issue from your ISP (Internet Service Provider)
Step 2) Disable Proxy Server
Step 3) Set IP and DNS server to automatic
Step 4) Run Network Troubleshooter
Step 5) Perform Network Reset- Make sure you have the WIFI password
Step 6) Run these commands
Ipconfig /flushdns
Ipconfig /release
Ipconfig /renew
netsh winsock reset
netsh int ip reset
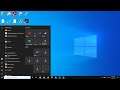
Step 7) Update network driver from device manager
Step 8) Uninstall the network driver and restart your PC- Make sure you have the WIFI password
Step 9) Update your Network Driver from system manufacturer website- You need internet connection for this- Connect ethernet cable to your PC if your computer has a ethernet port- If not then use another computer to download the network driver to external storage device such as external hard drive or Flash drive. Once downloaded connect the flash drive to the PC that does not have Internet connection and then install the driver, restart your PC and then connect to the internet.
Step 10) Reset Your PC
Step 11) Run hardware test to identify any issue with network card, if identified any failure with Network card please contact system manufacturer to get it replaced