How to Remove Audio from Video using VLC Media Player on Windows 10


Hi friends! This video will show you how to remove audio from Video using VLC Media Player on Windows 10.
1. Download and install VLC Media Player for Windows 10.
2. After the installation of the VLC Player is complete, launch the program.
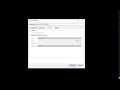
3. Click Media then select Convert/Save.
4. Click Add from the next screen.
5. Go to the current location of the Video whose sound you want to delete. Choose it from wherever it is then click Open. Now the video is loaded ready for audio separation.
6. Next, select Convert and save.
7. When the video conversion Window opens, select a suitable Output mode under the Profile section.
8. Now click on the Edit selected profile.
9. Then, go to the Encapsulation tab, you can choose a Video container of choice.
You are free to choose any other appropriate option depending on the type of video you are removing sound from.
10 After that, switch to the Video codec tab and tick the Keep original video track checkbox.
11. Go to the Audio codec This time you will deactivate the Audio provision by deselecting it.
12. Click Save to save all these settings.
13. It’s now time to select where you want the new Video file saved. Click Browse next to the Destination File.
14. Choose the desired location, give a fitting File Name for this file, and click Save.
15. Finally, click on Start button. You are almost done.
Note: Do not close VLC During Conversion process.
That's about it.
- See more:
How to remove and replace audio in Windows Movie Maker: https://youtu.be/OL7-X3bsinU