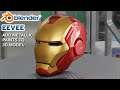
How To Add Metallic Car Paint To Model In Blender Eevee Tutorial

Simple tutorial. How to create in Blender, metallic car paint & add it to 3D Iron Man Mark III helmet model. The same method can be used to apply metallic paint to any other object or model in Blender. This method is for Eevee. This is easy way to paint a car, robot or metallic item in Blender.
Link to download Free HDRI
HDRI link https://hdrihaven.com/hdri/?h=machine_shop_02
If you have any questions or comments, please feel free to ask.
Patreon: https://www.patreon.com/join/oskuekart
Twitter: https://twitter.com/oskuek
Instagram: https://www.instagram.com/oskuekarts/
Pixiv: https://www.pixiv.net/en/users/6920478
Please like & subscribe to my channel. It would encourage me to make more Blender tutorials like this one. Thank you so much.
Quick Summary of steps in video:
Firstly, set up the scene quickly.
Open your model.
Select Eevee for the rendering at the Render Properties.
Import a hdr image.HDRI stands for High Dynamic Range Imaging, and is basically an image format that contains from the deepest shadow up to the brightest highlight information.
This HDRi becomes the background for a scene, but the HDRI also lights it. Each pixel from the HDR image contributes to the lighting of the scene. This way, the image lighting result resembles the real world scenario because real world lighting is very complex in behavior.
You can choose to use any HDR image you want. I tried to choose one with interior lighting.
Add the HDRI in Blender.
Turn on Ambient Occlusion under Render Properties. Set the distance to 2m.
Turn on screen space reflections.
Basically, ambient occlusion is a way to make objects in a scene look more realistic. Ambient occlusion casts shadows where objects are close to each other. It will also cast light where they are not. Screen Space Reflection is just mirroring the already rendered pixel. It gives a nice result especially for objects that touch the ground.
Open the Shader Editor.
Select a part on the model.
Go to the Metallic Input in Principled BSDF shader, and increase it from 0 to 1.
And then go to Base Color input, click on it to select the colour you desire.
Add a clearcoat. Turn it up to 2 for clearcoat.
Create a noise texture for the gold colour.
The Noise Texture is used to add procedural Perlin noise texture.
Connect it to the clear coat normal.
Next, add a bump node.
Connect it to height input.
Click on the top of the Noise Texture node & then Ctrl + T to activate node wrangler. Immediately the Texture Coordinate node & Mapping node are added.
We can create the tiling for the object
Connect the object output to vector input.
Turn down the details by reducing the distance in the Bump node.
Put it at a very low number. Like 0.0001.
Increase the tiling a little bit. Change the Scale to 15 in Noise Texture node.
Add a voronoi node for metallic flakes.
Add the Voronoi node & connect to basecolor input on the Principal BSDF.
Connect the Mapping node vector ouput to the Voronoi Texture node vector input.
Then, increase the Scale on the Voronoi Texture node.Up to 200.
Next, we separate the rgb & then combine the rgb.
Combine red & green. For blue, key in the value of 1.
Add a normal map node. Connect it to the normal input of the Principled Shader.
Connect the Combine RGB node to the colour input no the Normal Map node.
It looks odd & purplish, because we need to disconnect the Combine RGB node from the Principal Shader.
Now, turn down roughness just to make it look better.
To balance the metallic flakes, let's add a value node and connect it to scale and enter value of 15.
Turn the Normal Map node down to 0.1
Increase roughness to about 0.286 and we will drop specular to 0.1.
Go to Value Node and increase the value.
Bump it up to 4000.
Rename the material. Go to Material tab, and rename to Metallic Gold A. You can give it any name you want.
Once you have this, you can then use it to colour other parts of the model.
Select a part of the model, and then select the gold material renamed just now. And then click the duplicate button to duplicate it. Next, rename it. We are going to make this our metallic red colour easily.Then click the colour wheel again to choose the right colour for the red.
Go to Edit Mode, with face select type chosen, use the Circle Select to select all the faces for the mouth. Hold down Shift and select.
Once you've got it selected, back to Material properties tab, click the + sign to add new material. Select the gold colour.And then click Assign.So this is how you put 2 different colours on 1 object.
That's it. All done.
Note: The Iron Man Mark III helmet was modelled from scratch myself in Blender 2.91
Music Tracks in video
Track Title: Papov
Artist: Yung Logos
Track Title: Far Apart
Artist: Causmic
Track Title: Bar Crawl
Artist: JR Tundra